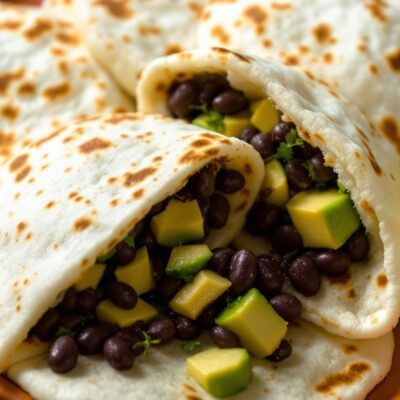





Featured image: AI-generated food illustration, not a photograph of a tested batch or a particular family’s kitchen.
The dinner that starts before you turn on the stove
What would you make if the bread were gone, there were beans in the cupboard, and nobody wanted another bowl of the same thing? An arepa offers one answer, but the most useful part of learning to make it happens before anything touches the pan.
At first, the ingredients can seem almost too simple: corn flour, water, salt, and a little oil for cooking. There is no yeast to wake up, no long rise to schedule, and no elaborate filling you must prepare before the meal counts.
That simplicity can also be misleading. If you reach for whichever bag of cornmeal happens to be nearby, you may find yourself fighting a dough that never behaves as promised.
The difference is not a secret skill that other cooks were born with. It begins with understanding the ingredient, then giving yourself permission to make a small adjustment rather than declaring the whole attempt a failure.
For people who already make arepas, this is familiar kitchen knowledge, not a new discovery. For someone meeting them for the first time, it is an invitation to learn a useful food without pretending that one recipe can represent every household that loves it.
A familiar food with more than one home
Arepas belong to longstanding food traditions in both Venezuela and Colombia. As Julius Fiedler’s recipe and background account explains, their roots reach back to Indigenous communities making food from maize before the modern countries existed.
That history deserves more care than a contest over which country makes the single correct version. Size, thickness, ingredients, and the way an arepa joins a meal can differ, and the version below is a starting point rather than a verdict.
Here, the aim is a thicker corn cake you can open and fill after cooking. Beans and avocado are an easy option; you can also serve the arepas alongside food you already planned to make.
The key shopping detail is precooked corn flour intended for arepas, often called masarepa. Ordinary coarse cornmeal, cornstarch, and masa harina for tortillas are not interchangeable with it in this particular recipe.
Minimalist Baker’s step-by-step guide makes that distinction clearly and offers a pan-and-oven method. Fiedler uses a stovetop approach, showing that a useful recipe does not have to look identical in every kitchen.
For a first attempt, choose one method and follow it instead of combining several halfway through. The recipe below follows Minimalist Baker’s basic proportions and pan-and-oven sequence, with a simple optional filling suggestion.
This is an adaptation of a published recipe, not a claim that UpVee tested a batch. Plan enough time to cook in batches if your pan is small, and let the dough’s texture guide the final spoonful of water or flour.
What to put on the counter
For about six substantial arepas, gather the following. The filling is optional, so you can make the corn cakes even if your refrigerator has something entirely different to offer.
- 2 cups warm water, plus a little extra if needed
- 2 cups precooked arepa corn flour, or masarepa, added gradually
- 1 teaspoon fine sea salt, or less to taste
- 1 tablespoon neutral cooking oil, with a little extra for a second batch if needed
- Optional filling: 1 can black beans, about 15 ounces, drained and rinsed
- Optional filling: 1 ripe avocado, sliced, and 1 lime, cut into wedges
Heat the oven to 350°F, or about 175°C, and line a baking sheet with baking parchment. Set out a large mixing bowl and a heavy skillet or nonstick frying pan.
Stir the salt into the warm water. Add the flour gradually while mixing with clean hands or a spoon, stopping when the mixture becomes a moist dough that holds together without coating your hands in a sticky layer.
You may not need the final spoonful or two of flour. Cover the bowl and leave it for five minutes so the flour can hydrate before you decide whether anything needs changing.
Now press a little dough into a disc. If it splits badly around the edges, work in a tablespoon of water and check again; if it remains too wet to shape after resting, add a small amount of the flour.
This is the moment worth noticing. A small correction is part of the method, not evidence that you have failed to follow it properly.
The crust is only half the job
Divide the dough into six portions and roll each into a ball. Flatten them between your palms into discs about half an inch thick, smoothing the edges gently rather than trying to produce perfectly identical circles.
Heat the skillet over medium-high heat and add enough oil to lightly coat its surface. Place the discs in the pan with space between them, working in batches rather than crowding them together.
Cook for about two to three minutes on each side, until a golden crust forms. Adjust the heat downward if the outside darkens too quickly; you want browning, not a burnt shell surrounding an unfinished center.
Move the browned arepas to the prepared baking sheet. Bake for about fifteen to eighteen minutes, until a little puffed and more golden, then let them rest for five to ten minutes before opening them.
The pause matters because a hot center can seem stickier when cut immediately. Do not expect the airy crumb of a wheat dinner roll: these are corn cakes, and their texture has its own character.
While they bake, warm the drained beans in a small saucepan with a splash of water, stirring until hot. Slice the avocado shortly before serving and put the lime wedges on the table.
Using care with the hot interior, cut each arepa most of the way around its edge, leaving a hinge. Add warm beans and avocado, then squeeze over lime if you like; a modest filling is easier to handle than an overstuffed pocket.
A meal you can learn without making it a performance
There is a particular relief in learning a food that does not require the whole evening to revolve around it. Once you understand the flour and the feel of the dough, the rest becomes a sequence you can recognize rather than a mysterious test.
That does not mean your first batch will be flawless. One might be thicker, another might brown faster, and a third might need a gentler hand when you open it.
None of those outcomes erases the useful thing you have learned. Next time, you can change one detail instead of abandoning the entire idea of making something unfamiliar.
If you are cooking for someone who grew up with arepas, ask how they like theirs rather than announcing that you have found the definitive version. Their answer may lead to a different thickness, filling, or family preference, and listening is part of learning the food.
Serve them warm, and refrigerate leftovers promptly rather than leaving filled arepas on the counter. Reheat until hot, understanding that fresh ones usually have the most appealing contrast between the crust and the soft interior.
A bag of the right flour will not solve a difficult week. It can, however, give you another practical way to turn a few ordinary ingredients into dinner.
What is the simple food someone taught you to make that still helps when you cannot think of what to cook?